
Think of a cluttered walk-in as a friendly project waiting for a makeover; you’ll be surprised how much good design can do. You can set a clear budget, measure once, and pick systems that give more hanging, smart shelving, and tidy cubbies without breaking the bank. Want high-end looks on a thrift budget? Try double rods, tiered rails, simple lighting, and DIY tweaks that grow over time—and avoid the usual layout mistakes so your closet actually works.
Closet Highlights
- Set a realistic budget and list must-have storage (hanging, shoes, folded shelves) before shopping or DIYing.
- Measure width, depth, height, door swing, and obstructions to design a space-efficient layout and avoid wasted purchases.
- Prioritize adjustable shelving, double hanging, and stackable organizers for flexible, high-capacity storage without custom costs.
- Use affordable upgrades—LED strip lights, clear bins, refreshed hardware, and painted trim—to improve function and aesthetics cheaply.
- Phase improvements: start with DIY or repurposed units, then add modular systems or drawers as budget allows.
Set a Realistic Budget and Storage Goals for Your Walk‑In
Ready to make your walk-in closet work for you? Start by facing your budget constraints honestly, then decide what matters most.
You’ll list storage priorities—shoe racks, hanging space, folded shelves—so each dollar stretches farther. Think about must-haves versus nice-to-haves, and set a spending cap that won’t stress you later.
Can you DIY some pieces or repurpose what you already own? Small changes often give big gains. Consider adding stackable organizers to increase usable vertical storage without large expense.
Keep your goals simple and specific: fit all coats, display shoes, or create a dressing nook. When you’re clear about needs and limits, choices become easier, and shopping feels purposeful.
You’ll feel excited as plans fall into place, knowing your closet will finally serve you. Consider incorporating stackable storage to maximize vertical space and make the most of a small budget. Also consider adding collapsible bins to tuck away seasonal items and keep shelves tidy.
Measure and Map Your Closet Before Buying Anything

You’ve set your goals and limits—now measure the space you’ve got so every decision fits both your budget and your needs.
Start by clearing the closet and taking basic measure techniques: tape measure for width, depth, and height, record door swings, and note obstructions like vents or light switches.
Clear everything, then measure width, depth, height—note door swings and obstacles like vents or switches.
Sketch a simple closet mapping on paper or use a phone app, marking shelves, hanging zones, and shoe space. Measure twice, jot dimensions clearly, and add usable versus awkward areas. Consider incorporating modular systems to allow adjustable shelving and hanging solutions as needs change.
Will you need double rods or tall shelving? These notes save money and frustration later. When you buy components, you’ll match sizes and avoid returns.
Good mapping makes a functional closet feel achievable and exciting. Consider using stackable storage to maximize vertical space and adapt to changing needs. Also plan for walk-in closet layouts that balance accessibility and storage capacity.
Choose the Right Affordable Closet System for Your Needs
Start by thinking about what you actually need to store—shoes, folded sweaters, long coats, or a mix of everything—and prioritize the features that will make daily life easier. Consider using durable, odorless materials like non-woven fabric for organizers to ensure longevity and a safe storage environment. Measure your closet dimensions and assess items to determine organizer size and quantity to avoid overcrowding, especially in walk-in layouts with limited depth and clearance for accessories like shoe racks and baskets, and consider vertical space when planning.
Compare materials like laminated particleboard, metal, and solid wood for durability, look, and cost so you can pick the best fit for your budget. Don’t overlook clear options such as acrylic shelf dividers for visibility and maximizing vertical space.
Which pieces matter most to you, and how can a smart material choice keep your closet functional without breaking the bank? Think about versatile sizing and multi-compartment organizers to accommodate different items.
Consider adding compact, vertical solutions like portable closets with multiple hanging rods to maximize space in small rooms. Foldable, tool-free organizers can also help you adapt the layout as needs change.
Assess Storage Needs
How much space do you really need, and what do you want to keep within easy reach? Think about daily routines: outfit choices, shoes, accessories, and seasonal gear.
List your storage priorities—what must be visible, what can be tucked away, and what needs hanging versus folding. Measure your walk-in, note awkward corners, and imagine clear zones for morning prep, off-season items, and laundry. Consider using stackable bins rated for up to 6.6 lbs to keep lightweight clothing organized and accessible. Many affordable options are stackable storage that maximize vertical space without costly installation.
Visualizing tasks helps you pick shelves, rods, and drawers that match behavior. Prioritize items that save time and reduce stress.
Closet organization should support how you live, not force you to change. Start simple, then tweak. When you plan based on real use, you’ll find an affordable system that feels custom and works beautifully. Consider adding linen storage bins for bulkier folded items to maximize shelf space.
Compare Material Options
Now that you’ve mapped out what needs to be stored and how you move through your closet, it’s time to match those habits to materials that fit your budget and lifestyle.
You’ll weigh wood vs. laminate choices: solid wood feels warm and durable, but laminate gives you the look for less, resists scratches, and cuts installation time. Think about daily use—do you want a handcrafted feel or easy upkeep? Consider adding stackable bins to make use of vertical space without a major remodel. Many affordable systems pair laminate with stackable closet baskets to maximize storage efficiently.
Next, consider metal vs. plastic for hardware and shelving: metal is sturdy, clean-lined, and great for hanging heavy coats; plastic is lightweight, affordable, and simple to swap out.
Which mix matches your routine and style? Pick materials that balance cost, longevity, and appearance so your walk-in stays functional and inviting for years. Consider vertical space-saving organizers like the multi-tier shelves seen in modern closet systems to maximize storage without increasing footprints.
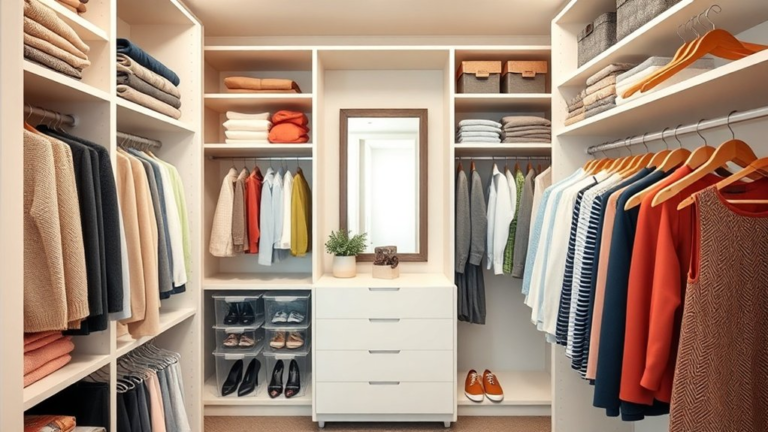
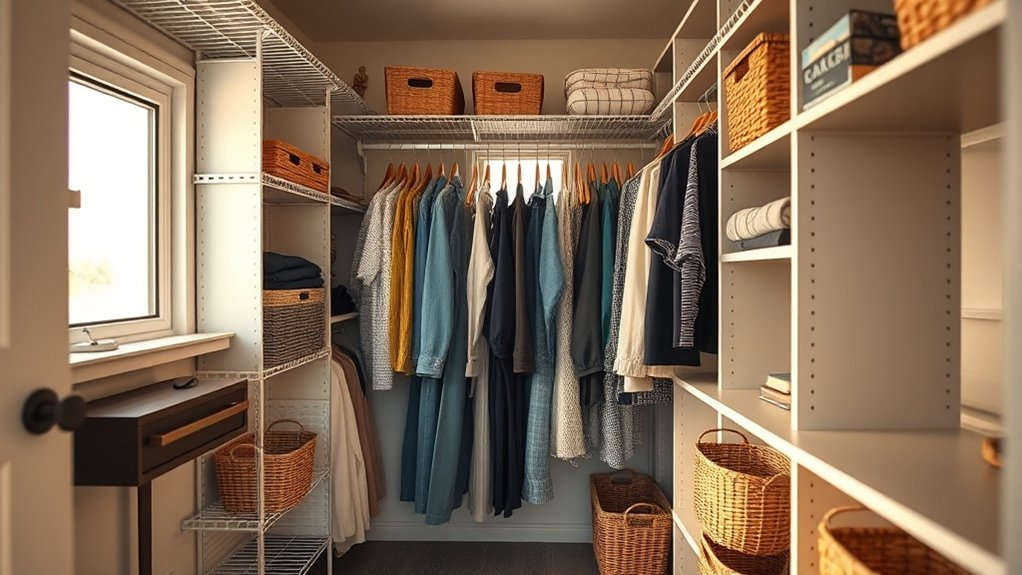
Maximize Hanging Space With Double Rods and Tiered Rails
When you rethink vertical space, double rods and tiered rails can nearly double the amount of clothing you hang without crowding your closet, and that transformation feels immediately freeing.
You’ll feel the difference when you choose smart hanging strategies and plan rod placement to match your wardrobe. Put a higher rod for longer garments and a lower double set for shirts and pants, so nothing drags or wrinkles. Many budget-friendly setups pair well with 4FT Small Closet Organizer to add drawers and shelves for folded items.
Tiered rails are great for seasonal rotation, letting you keep current outfits accessible while stashing off-season pieces above. Installation is simple, often using adjustable brackets that let you tweak heights as needs change. Many budget-friendly setups pair well with stackable organizers to maximize space and organization.
Ready to clear floor clutter and see everything at a glance? Small changes create big, joyful results. Stackable storage solutions like clear stackable drawers can complement hanging systems to keep accessories tidy.
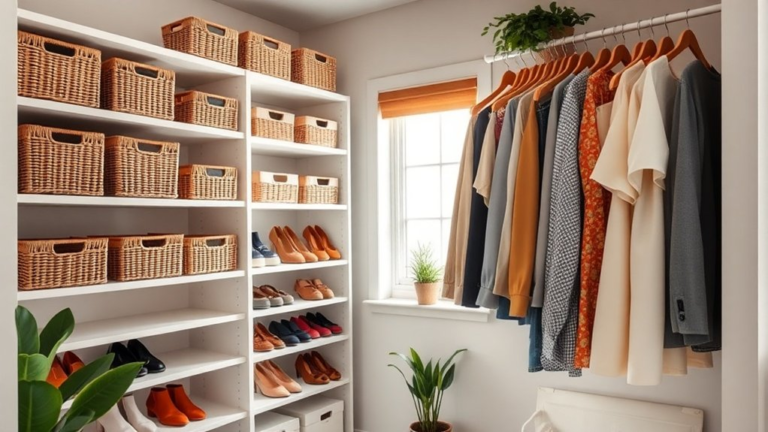
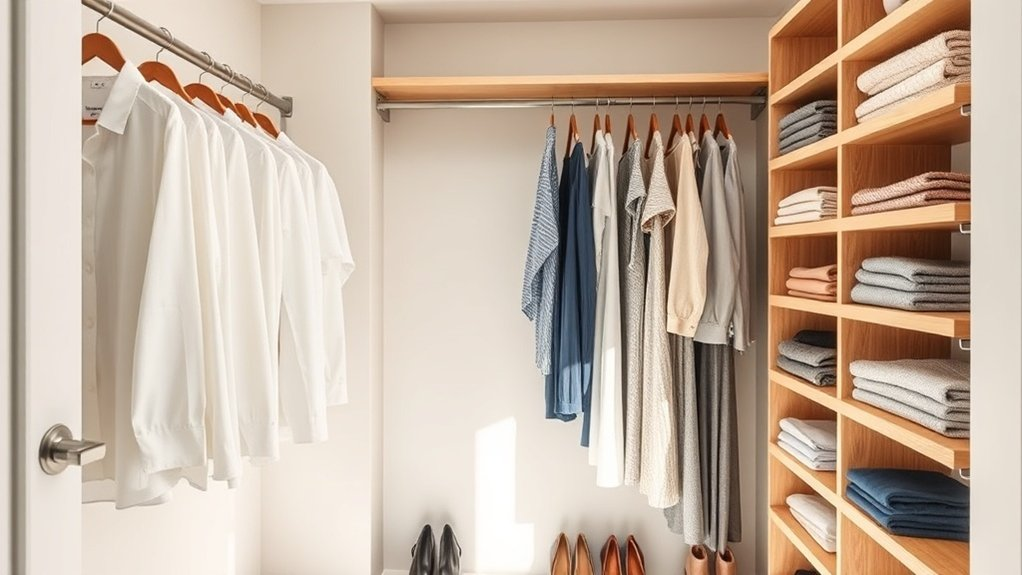
Use Shelving and Cubbies to Store Folded Clothes and Bins
Because shelving and cubbies give you clear sightlines and easy reach, they’ll turn folded piles into simple systems you actually enjoy using.
Choose shelving styles that match your budget and style—open wood for warmth, metal for an industrial vibe, or painted MDF for a clean look. Mix shallow and deep shelves to store tees, sweaters, and seasonal bins without wasting space. Consider adding stackable organizers to make use of vertical space and keep smaller items contained. For extra durability and moisture protection, choose materials like polypropylene or non-woven fabric for your bins and organizers.
Pick shelves that suit your style—warm wood, industrial metal, or clean painted MDF—and mix depths for efficient storage.
Cubbies work great for grouping items by type or person; experiment with cubby configurations to find what feels effortless. Use uniform bins or baskets for small pieces, label fronts, and leave a few open shelves for display.
You’ll find dressing is quicker, mornings less stressful, and your closet looks cared for. Ready to try one shelf at a time? Consider adding stackable organizers for vertical space to maximize capacity.
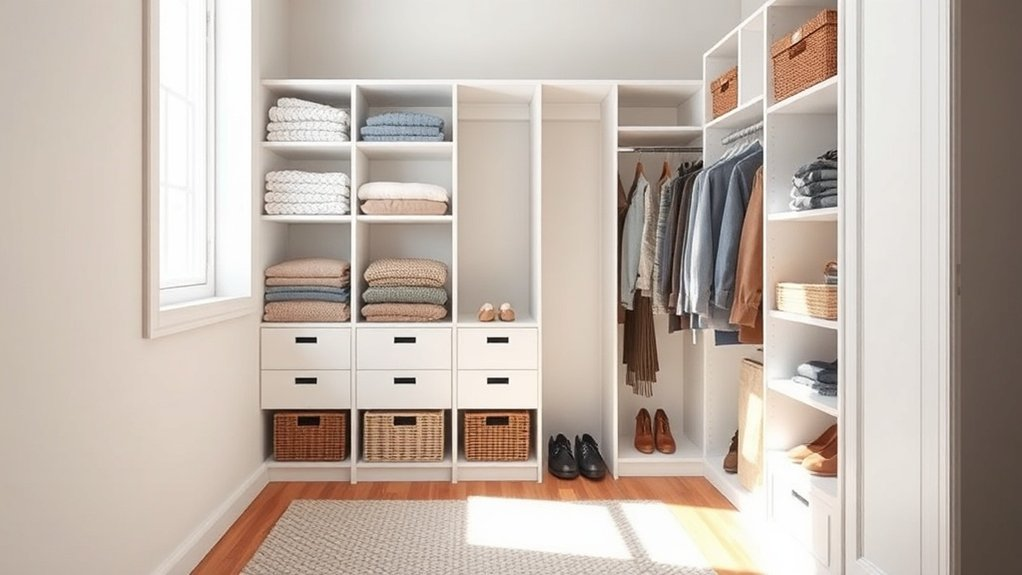
Add Inexpensive Drawer and Shoe Organizers That Save Space
A few simple organizers can turn chaotic drawers and overflowing shoe piles into a calm, useful part of your closet that you actually enjoy using.
Start with drawer dividers and clear organizers so socks, scarves, and accessories have a tidy home you can see at a glance. Consider adding transparent bins to make identifying contents even faster. Opt for organizers made from waterproof PP plastic to ensure easy cleaning and long-term durability.
Add shoe racks or vertical storage towers to reclaim floor space and make mornings smoother.
Choose budget bins and collapsible boxes for seasonal items; they tuck away when you don’t need them.
Look for multifunctional furniture, like benches with hidden compartments, to double storage without clutter.
Decorative containers make things feel intentional, not thrown together.
Ready to simplify? Pick one area, add a few smart pieces, and enjoy the small wins that add up fast.
Consider durable materials like thick non-woven fabric when choosing organizers to ensure they hold up over time.
Lighting and Hardware Upgrades That Look High‑End on a Budget
If you want your closet to feel like a boutique without spending a fortune, small lighting and hardware upgrades make a huge difference.
Swap harsh bulbs for warm LED lighting fixtures that brighten rails and shelves, showing true colors and making outfits pop. Add adhesive strip lights under shelves, or a motion-sensor puck light for instant, hands-free glow. Consider installing rechargeable lighting options to avoid frequent battery replacements and simplify maintenance. Many budget-friendly LED options also offer dimming and color-temperature adjustments for more control over atmosphere, including stackable storage solutions that pair well with illuminated shelves.
Then, refresh pulls and knobs with a consistent hardware styles choice—matte black, brushed brass, or satin nickel—for an instant designer touch. You don’t need custom work to get cohesion.
Replace old brackets or hinge covers so everything looks intentional. These changes are quick, affordable, and satisfying.
Ready to try one upgrade this weekend and see how luxe your closet can feel? An affordable option to start with is a rechargeable motion-sensor light offering rechargeable battery convenience and easy installation.
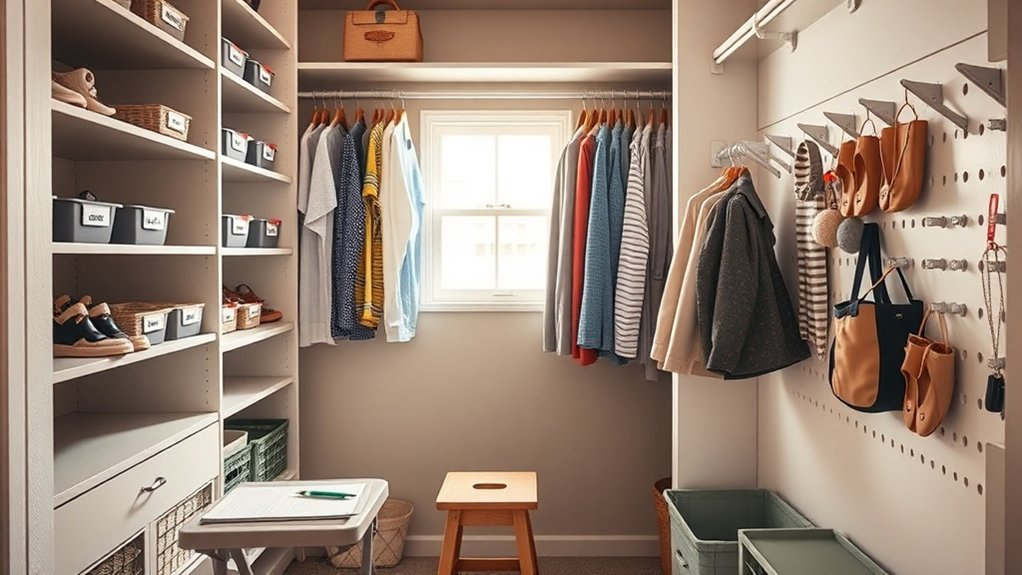
DIY Builds and Hacks to Customize Cheap Wire or Laminate Systems
When you want a closet that fits your life without blowing the budget, cheap wire or laminate systems become great starting points for creative DIY upgrades.
You can turn basic wire shelving solutions into polished storage by adding trim, wooden fronts, or painted pegboard backdrops for shoes and accessories. Consider using stackable organizers to maximize vertical space and keep seasonal items accessible.
Laminate hacks work wonders too: attach affordable pull-out baskets, cut simple shelves to fit, or overlay textured contact paper for a richer look. Consider using reinforced plastic or metal hooks on pull-out baskets to improve sturdiness and weight capacity.
Want more function? Install adjustable rods, add labeled bins, or mount small shelves for handbags.
You’ll find the projects are faster and cheaper than you think, and each change makes your space feel more personal.
Ready to roll up your sleeves and customize a closet that cheers you every morning? Consider systems with adjustable shelves to maximize storage flexibility.
How to Phase Upgrades Over Time to Spread Costs
Start by choosing the high-impact areas that will make the biggest difference, like shoe storage or a clothing rod you use every day, so you’ll feel improvement fast.
Then schedule small, affordable installments—one shelf or drawer at a time—so upgrades fit your budget and your schedule. Consider adding vertical storage like hanging organizers to maximize space as you go.
Don’t discard what you have: look for ways to reuse and repurpose baskets, bins, and hangers, and you’ll stretch every dollar while you build toward the closet you want.
Consider creating a simple organization checklist to prioritize projects and track progress over time.
Prioritize High-Impact Areas
Think of your closet upgrade as a short series of small wins you can afford, rather than one big, stressful makeover.
Start by spotting the high-impact areas that change daily life: lighting, easy-to-reach hanging, and clear shelving. You’ll follow current design trends without overspending by choosing versatile pieces that pair with new storage solutions.
Ask yourself where morning routines stall—can bright bulbs or a lower rod save minutes and stress? Tackle those spots first, then move to less-used zones.
Prioritizing this way keeps costs steady and motivation high. You’ll see improvement fast, which encourages the next step.
Small, smart choices add up to a closet that feels intentional, calm, and truly yours.
Schedule Small Installments
Phasing your closet upgrades into three or four small installments makes the process feel doable and even a little fun, and you’ll keep more money in your pocket as you go.
Start by setting clear budget planning goals: decide what you can afford each month and what changes matter most. Break projects into bite-sized tasks—add a shelf now, improve lighting next, then tackle hanging space—so each step gives visible progress.
Incremental upgrades let you try solutions, learn what works, and avoid costly mistakes. You’ll stay motivated as each installment improves daily life.
Ask yourself which change will make mornings easier? Schedule the work, track spending, and celebrate milestones.
Small moves add up to a closet you love.
Reuse And Repurpose Items
Once you’ve broken the work into manageable steps and seen how small upgrades add up, you can get creative about stretching your budget by reusing and repurposing what you already own.
You’ll phase changes over time, choosing budget friendly solutions that still look polished. Think about turning vintage finds into focal pieces, or using upcycled containers for drawer dividers.
Repurposed furniture can become a custom shoe bench, and thrifted decor adds personality without the cost. You’ll love how DIY storage projects build momentum and confidence.
- Use upcycled containers to organize small items
- Refurbish repurposed furniture for new closet roles
- Hunt thrifted decor and vintage finds deliberately
- Build simple DIY storage for shelves and cubbies
- Mix creative storage with functional aesthetics
Common Mistakes to Avoid When Outfitting a Budget Walk‑In
When you’re working with a tight budget, it’s easy to make choices that feel practical in the moment but leave your walk-in cluttered or underused, so pause before you buy.
Start by avoiding budget friendly mistakes like grabbing mismatched shelving or too many single-use organizers that soon become junk drawers.
Don’t ignore measurements; guessing wastes money and space.
Beware of closet organization pitfalls such as overloading rods or crowding shelves so nothing is visible.
Think flexibility: can pieces be moved or repurposed later?
Add lighting and clear bins where it counts, rather than trendy accents that don’t help.
Ask yourself what you really wear, then plan for that.
Small, thoughtful choices make a big, joyful difference.
Conclusion
You’ve planned, measured, and picked smart solutions, but the best part is what’s next — the moment your closet finally fits your life. Picture easy mornings, shoes lined up, clothes breathing, light where you need it. You can start small, tweak as you go, and still end up with something that feels intentional and calm. Ready to take the first step? Your dream walk‑in is closer than you think.