You can make a tidy, stylish closet without spending much, and dollar-store finds make it easy. Think slim hangers, clear bins, tension rods, and labeled jars to cut clutter and save time — simple swaps that actually change how your space works. Want to prep in 15 minutes, build shelf dividers, or double hanging space with zero tools? Keep going to see practical hacks and step-by-step ideas you can use right away.
Closet Highlights
- Use slim hangers, clear bins, and adhesive hooks from the dollar store to reduce clutter and increase visible storage.
- Create extra hanging space with tension rods or shower hooks for inexpensive, no-drill garment organization.
- Sort in three piles—keep, maybe, go—and wipe shelves; take a photo inventory before buying new items.
- DIY foam-board shelf dividers and repurposed magazine holders for shoes to maximize vertical space affordably.
- Label bins and trays with adhesive labels or washi tape and schedule weekly tidies to maintain order.
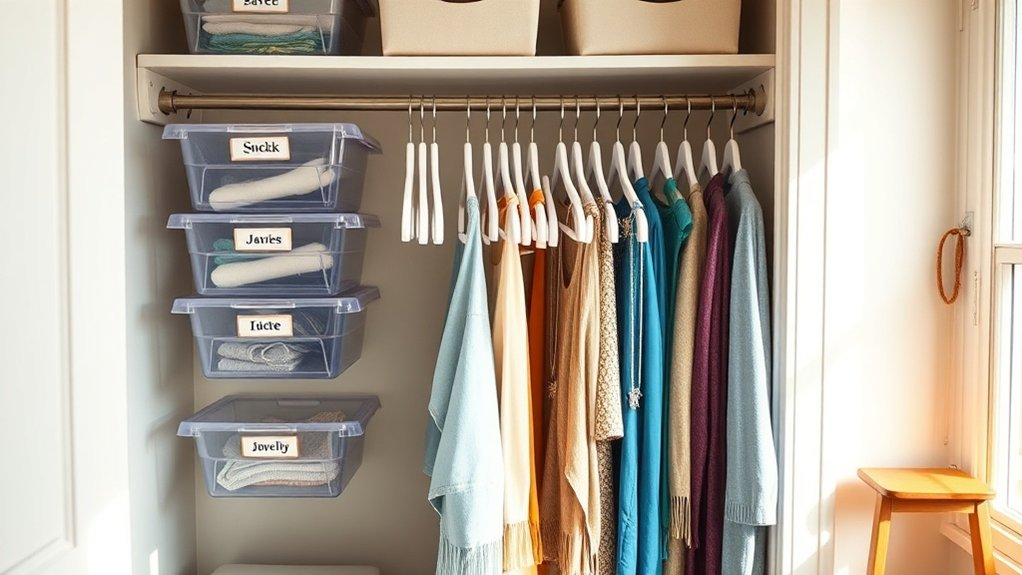
Quick Dollar-Store Buys That Transform Any Closet
You can totally refresh your closet without spending much—start with a quick trip to the dollar store and watch small finds make a big difference.
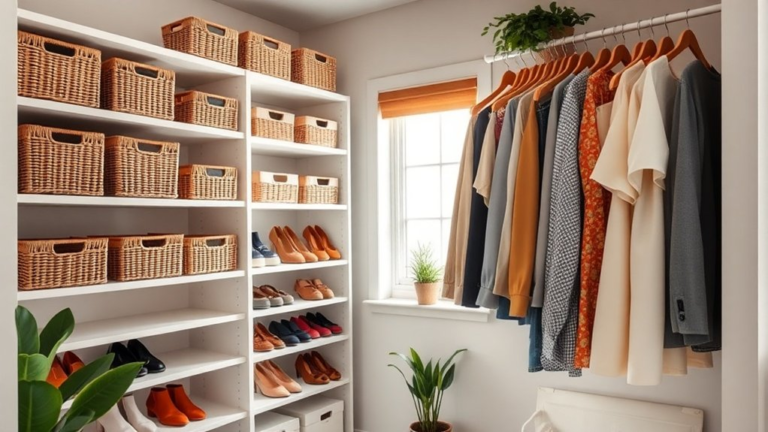
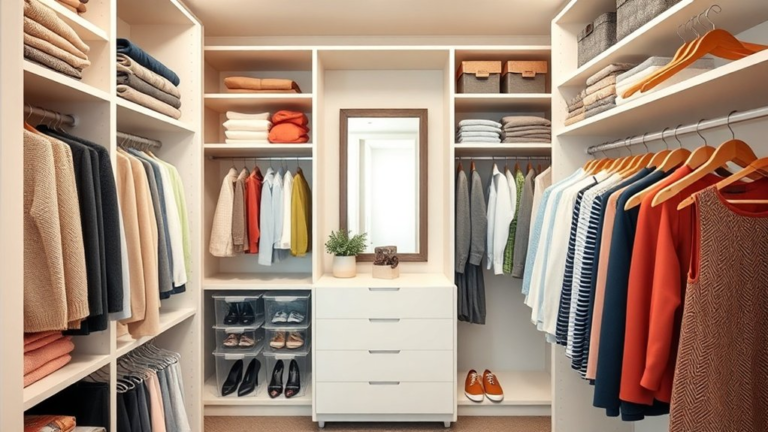
You’ll grab simple closet essentials like slim hangers, clear bins, and adhesive hooks that instantly tidy visual clutter. Consider adding hanging organizers to maximize vertical space and create more usable storage. Adding a few stackable bins can dramatically increase usable vertical space and keep items neatly separated.
Try drawer dividers for socks and scarves, and use small baskets to corral belts and seasonal items.
Storage hacks like labeled jars for buttons or clips save time and keep things neat.
Don’t forget non-slip shelf liners to protect delicate pieces and command strips for lightweight jewelry displays.
You’ll feel proud every time you open the door.
Ready to transform a chaotic space into a calm, useful area? It’s easier than you think.
Consider supplementing dollar-store buys with affordable stackable baskets to maximize vertical space and keep items organized.
How to Prep Your Closet in 15 Minutes Before Shopping
Set a timer for 15 minutes and get ready to work smart, not hard; a little focused prep will save you time and money when you shop.
Begin by opening every door and scanning quickly, forming a simple closet inventory in your head: shoes, seasonal items, jewelry, and mismatched things.
Open each door, scan fast, and note shoes, seasonal pieces, jewelry, and any mismatched items for a quick inventory.
Pull out anything broken or stained—donate or toss it.
Use quick declutter strategies: make three piles labeled keep, maybe, and go.
Don’t overthink outfits; trust your gut.
Wipe a shelf or shake a rug if you spot dust.
Take a photo with your phone so you remember what you actually own.
In fifteen minutes you’ll feel lighter, clearer, and ready to buy only what your closet truly needs.
Consider creating a simple maintenance plan with regular check-ins to prevent clutter from returning.
Add inexpensive storage options from dollar stores like bins and hooks to maximize space with budget-friendly solutions. Also consider adding vertical storage pieces to make the most of unused height in your closet.
Make-Ahead Shelf Dividers Using Foam Board and Adhesive Hooks
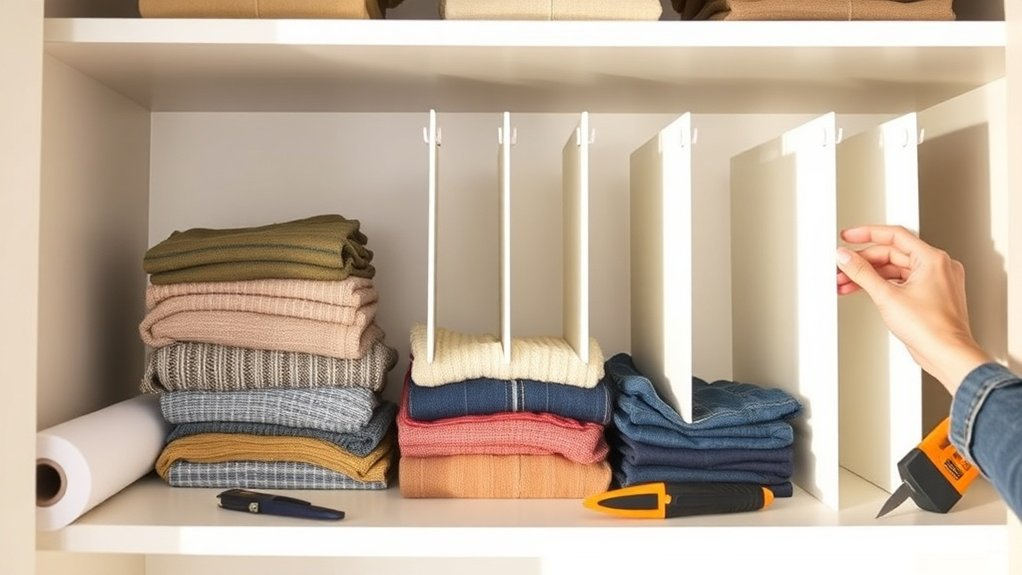
You’ll love how simple it’s to make shelf dividers with foam board and adhesive hooks, and I’ll walk you through the materials and tools you’ll need so you’re ready before you start. Consider using foam board because it’s lightweight yet sturdy and pairs well with budget-friendly finds from dollar stores. Using stackable storage principles when positioning dividers helps you maximize vertical capacity and keep items orderly.
Measure and cut your foam board carefully, and I’ll share easy tips for getting clean edges and the right sizes for your shelves.
Once you’ve got the pieces, you’ll see how quick installation can be with a few smart placement tips that keep everything steady and neat.
Prioritize designs that maximize vertical space to get the most out of small closets.
Materials And Tools
A simple shopping list can make this mini project feel doable and even fun, so gather a few basic supplies before you begin: foam board, a sturdy ruler or straightedge, a sharp utility knife, a pencil, and adhesive hooks rated for the weight you plan to support.
These storage solutions are easy on the wallet when you pick up dollar finds for foam board and hooks, and they’ll transform your shelves without fuss.
Also grab sandpaper for smoothing edges, double-sided tape for extra hold, and a small level to keep dividers straight. You’ll want gloves for safe cutting and a cutting mat to protect surfaces.
Ready to start? Having the right tools makes the project quick, tidy, and satisfying. Consider using stackable storage to maximize vertical space and keep items organized. Adding durable materials like reinforced shelves can improve longevity and support heavier items.
Cutting And Measuring
Measure twice, cut once—this simple rule will save you time and keep your shelf dividers neat and sturdy. You’ll feel confident when you use basic measuring tools, like a tape measure and a ruler, to mark foam board accurately. Using measurements that match your closet dimensions ensures you maximize space efficiency when installing the dividers. Consider also checking your shelf depth against standard stackable organizers to ensure a snug fit.
Choose simple cutting techniques: score and snap for straight edges, or use a craft knife for curves. Work on a protected surface, keep your lines visible, and breathe—precision makes installation easier later.
- Mark each divider clearly before cutting so you don’t guess.
- Use a triangle or square to keep corners true.
- Cut slowly, following your scored lines for clean edges.
- Label pieces by shelf depth to avoid confusion.
Ready to cut? Your careful prep will pay off. Consider using durable materials like rust-proof stainless steel for permanent fixtures that complement your temporary foam-board dividers.
Installation Tips
Once you’ve cut and labeled your dividers, it’s time to install them so your shelves start working for you, not against you.
Position a divider where you want a section to begin, press an adhesive hook on the shelf lip, and hang the divider so it stands upright. Use two hooks for taller dividers to keep them steady. If shelves are deep, stagger hooks so dividers don’t wobble. For extra stability on heavier items, consider anchoring dividers with lightweight shelf dividers designed to prevent slippage. These hanging solutions are simple, inexpensive, and change how you see space. For long-term durability, choose materials that are water-resistant when possible.
Want uniform rows? Measure spacing and mark lightly with pencil before sticking hooks.
These organizational hacks let you rearrange without tools, and they protect shelves from damage. You’ll love the immediate order and the calm it brings to your closet. Consider using clear acrylic dividers for visibility and a minimalist look.
Turn Plastic Bins Into Labeled Pull-Out Organizers
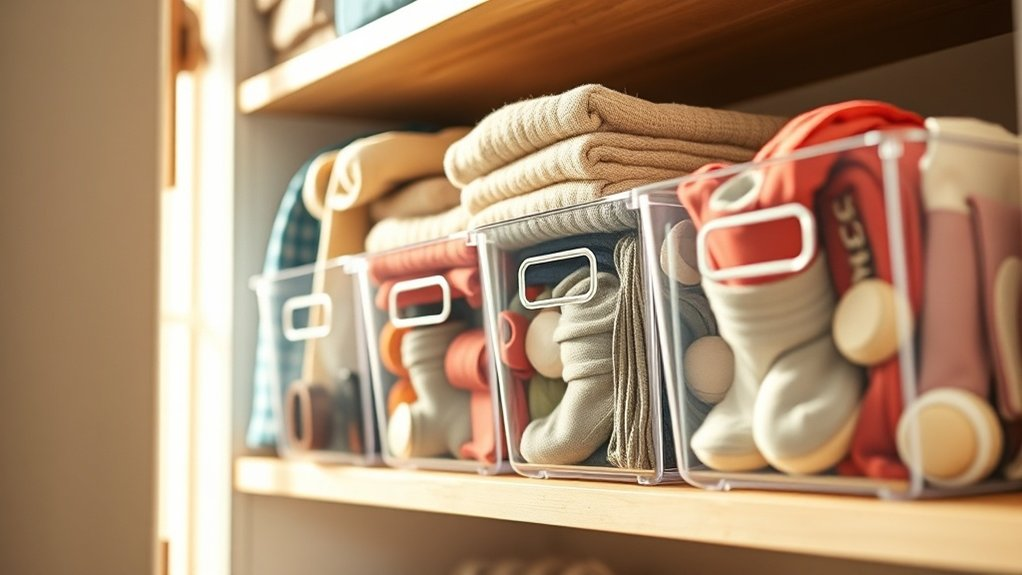
Start by measuring your plastic bins and the shelf so each container slides out smoothly without sticking or tipping.
Then label the front of each bin with clear, simple tags so you can grab what you need in seconds—socks, crafts, or winter scarves.
Isn’t it satisfying to see everything organized and easy to reach?
Adding stackable or anti-tip features can improve safety and maximize vertical storage in tight closets.
Also consider using space-saving methods to make the most of every inch.
Consider choosing durable materials like waterproof PP for bins that resist moisture and last longer.
Measure Bin And Shelf
Before you cut or buy anything, take a few careful measurements so your plastic bins slide easily and fit snugly on the shelf. Measure the shelf dimensions front-to-back and side-to-side, note any lip or overhang, and jot down the usable height. Compare those numbers to each bin’s external size and bin capacity so you know what’ll actually hold what. Consider using stackable storage bins to maximize vertical space and keep the look cohesive. Also factor in vertical space optimization when planning placements to make the most of your closet height.
- Measure twice: width, depth, and height for a perfect fit.
- Check bin capacity to match items like scarves, socks, or crafts.
- Allow a small gap for easy sliding and extra clearance for handles.
- Sketch a simple layout to visualize rows, stacks, and pull-out spacing.
With clear numbers, you’ll shop confidently and make bins that feel custom-made. Also think about material durability when choosing bins so they hold up under regular use.
Label For Quick Access
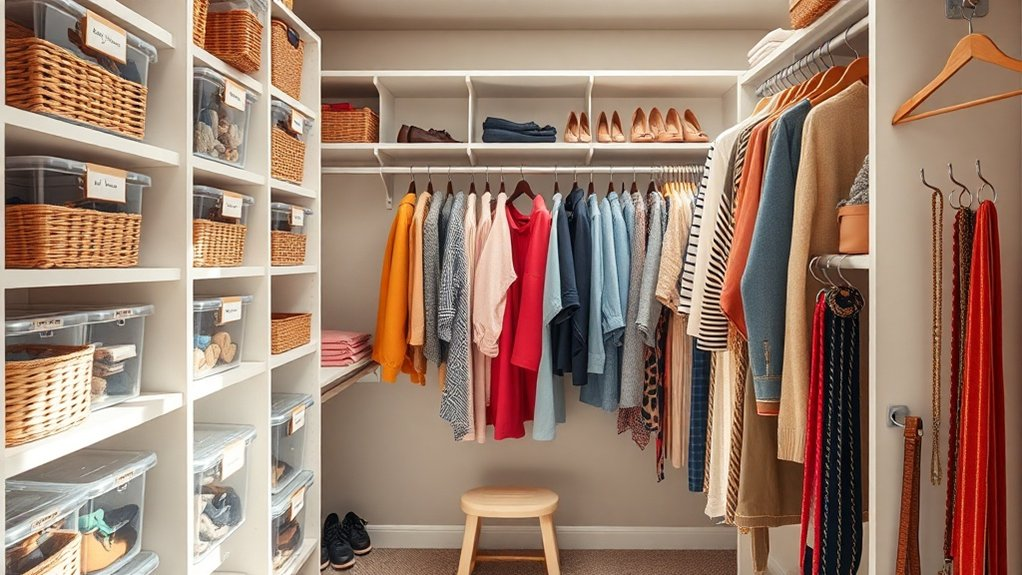
Labeling your plastic bins turns a messy shelf into a calm, easy-to-use system that saves you time and frustration.
You’ll love how simple labels make pull-out organizers feel intentional, like a mini boutique for your things. Use clear labeling techniques: adhesive labels, chalkboard stickers, or washi tape with a permanent marker. Consider combining color-coded labels to simplify categorization and help young children learn days or categories with visual cues like those used in kids’ organizers color-coding.
Write large, keep wording consistent, and include contents plus category—think “socks,” “scarf extras,” or “seasonal masks.”
For quick access, place frequently used items at eye level and less-used ones below. Slide bins forward when you need them, then tuck them back in.
These small organization strategies change daily routines, cutting search time and stress.
Ready to try it? Grab a pack of labels and start sorting today. Consider choosing containers made from heavy-duty clear materials to keep contents visible and protected.
Closet organization tips like decluttering, categorizing, and using uniform containers help create an efficient system and reduce decision fatigue when getting dressed; see basic organization principles for guidance.
Use Tension Rods and Shower Hooks to Double Hanging Space
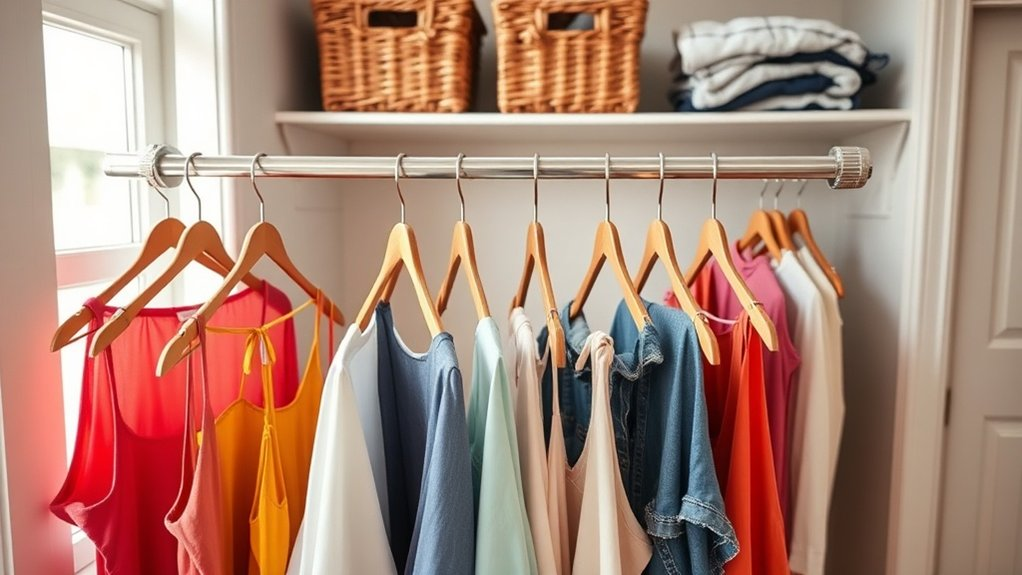
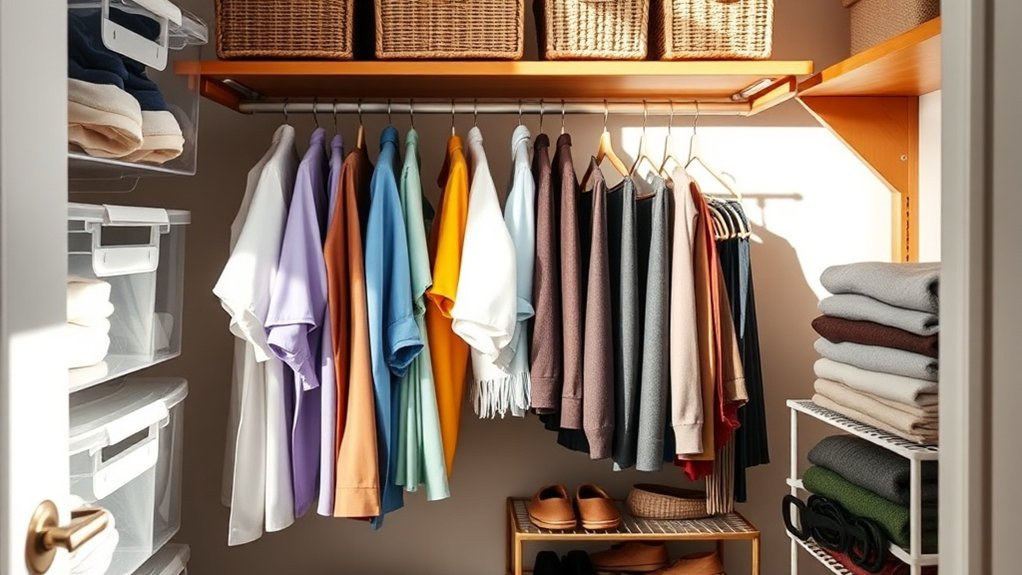
One simple trick can instantly double the amount of hanging space in your closet: use tension rods and shower hooks to create a second rail beneath your existing one.
You’ll love this space maximization hack because it’s cheap, fast, and reversible. With a rod placed lower, you get tidy rows of shirts, skirts, or kids’ clothes without cramming. Shower hooks slide on easily and let you stagger garments or group outfits by day.
- Quick install: no tools or drilling needed
- Versatile: move rods to fit different items
- Budget-friendly: dollar-store parts save money
- Neat results: clothes stay visible and wrinkle-free
Ready to try this hanging solutions trick and feel organized today? Adding a second rail is especially effective in small closets where vertical solutions make the most of limited space. Adding a lower rod is a great way to maximize available space and keep clothing organized without major modifications. Adding lightweight stackable bins underneath the lower rod creates extra storage for shoes and accessories.
DIY Shoe Storage From Magazine Holders and Command Strips
Try using three simple items—magazine holders, Command strips, and a little creativity—to turn wasted wall space into easy shoe storage that you’ll actually use. These shoe holder hacks save money and make mornings calmer. Consider pairing this with under-shelf wire baskets to store seasonal accessories and maximize space space optimization.
You’ll mount magazine holders on a closet wall, staggered or in neat rows, to cradle flats, sandals, or even sneakers. This magazine holder repurpose keeps shoes visible, off the floor, and easy to grab.
Use strong Command strips to avoid drilling, follow weight limits, and press firmly for a secure hold. Want to fit more pairs? Angle holders slightly upward to prevent slipping.
These shoe holder hacks save money and make mornings calmer. Ready to reclaim that floor space and enjoy a neater closet? It’s simple, satisfying, and totally doable.
Adding inexpensive stackable designs can further maximize vertical space and adapt as your storage needs grow. Adding waterproof plastics for lining can help protect against moisture and make cleanup easier.
Create a Budget-Friendly Accessory Station With Trays and Cup Organizers
If you’ve cleared floor space with those magazine-holder shoe racks, you’re already halfway to a calmer closet—now let’s make your accessories just as tidy.
You’ll love how simple tray arrangement and cup organizers turn chaos into calm. Set a small tray on a shelf for daily essentials, then group smaller cups for rings, earrings, and hair ties. That combo keeps things visible and fast to grab.
- Use shallow trays for watches and sunglasses.
- Repurpose plastic cups for bracelets and cords.
- Label each cup so you’ll always know where things go.
- Stack trays by frequency: top for daily, bottom for occasional.
This accessory organization method feels fresh, costs little, and invites you to keep everything in its place.
Styling Swaps: Camouflage Clutter With Matching Baskets and Fabric
Because matching baskets and a simple length of fabric can instantly tame visual clutter, you’ll find your closet feels calmer and more put-together without spending a lot, or doing major renovations.
You can mix and match basket styles to create rhythm—wicker-look, wire, or woven plastic all work.
Think about fabric choices for shelf liners or curtain fronts: canvas, cotton, or burlap give different textures and budget perks.
Use color coordination to unify mismatched items, then try subtle pattern mixing with stripes or small florals to add interest without chaos.
Vary sizes to fit shoes, scarves, and bulky sweaters—size variations matter.
These simple storage solutions make your space feel curated.
Ready to swap pieces and see the difference?
Maintenance Plan and Low-Cost Replacements to Keep Your Closet Tidy
When you set up a simple maintenance plan and keep a shortlist of low-cost replacements, your closet stops slipping back into chaos and becomes a space you actually enjoy using. You’ll feel proud every time you open the door.
Decide a maintenance frequency — weekly quick tidies and a monthly reset work well — and stick to it. Have a small stash of dollar-store replacements: hooks, shelf liners, drawer dividers, and clothespins. Those items let you fix problems fast without breaking the bank.
Set a simple routine—weekly tidies, monthly resets—and keep dollar-store fixes handy for quick, budget-friendly maintenance.
- Replace worn hangers and broken hooks immediately.
- Swap stained bins with matching dollar-store finds.
- Re-line shelves when dust or spills build up.
- Keep a tiny repair kit for quick fixes.
These budget friendly tips keep momentum going. What’ll you tackle first?
Conclusion
You’ve got this—small changes can make a big difference. Like a friendly breeze clearing a messy room, dollar-store finds help you reshape your closet into an organized, calm space you’ll love. Prep quickly, use simple DIY tricks, and match baskets for a tidy look. Can you picture pulling labeled bins and finding what you need in seconds? Start today, keep a quick maintenance routine, and enjoy the clarity and calm every morning brings.